Boom Cards for Piano through Boom Learning FAQ
Happy New Year, TEACHERS!!! Wow, I cannot believe it is already 2022 and time to begin a new year! *Cue the confetti* ??? For someone who had a very heartbreaking 2021, I am trying to keep my head up and see all the good that can come with this new year. 
Whether you are new around here or have been hanging out with me for a while, you will quickly learn that I am a firm believer in making learning FUN. I absolutely looove coming up with new and exciting ways to make my piano lessons engaging for my students, and I love helping other teachers do the same!
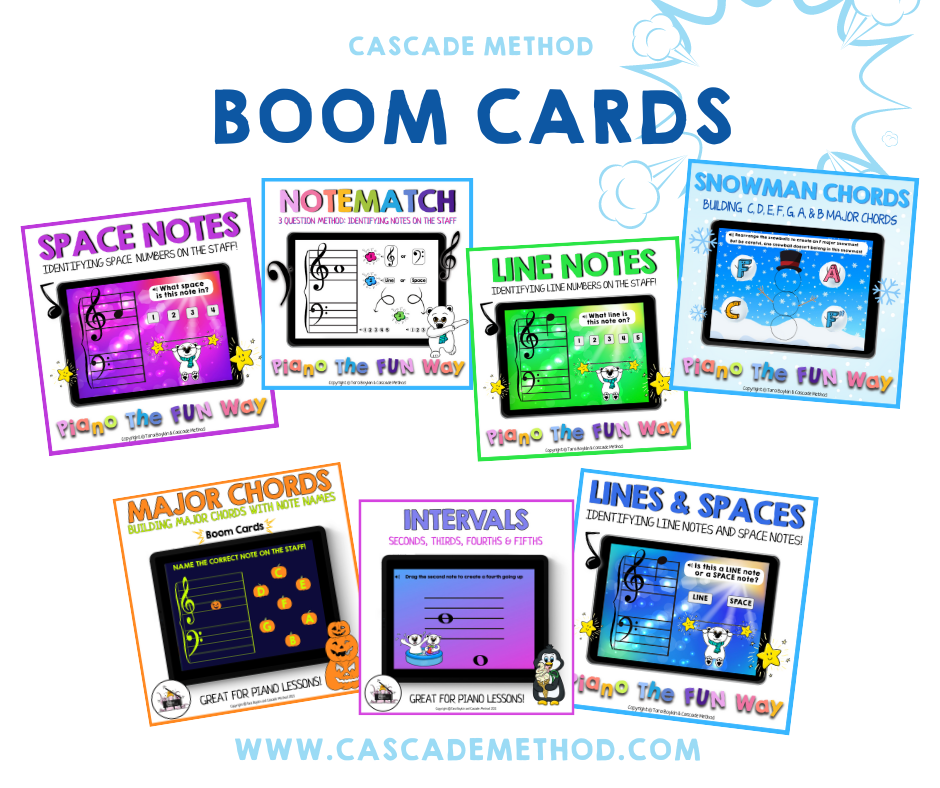
If you’re familiar with the Cascade Method, then you may already know we offer many tools and resources for piano teachers. Last year, I discovered boom cards and they have easily become one of my absolute FAVORITE tools for teaching!!! I love to use these with my students because they make learning more exciting and are so fun for the kiddos (of all ages) – win-win! You can access boom cards through Boom Learning and we just so happen to have our very own Cascade-original boom card decks for piano teachers that you can shop for!
Boom cards help students focus on different theory concepts including intervals, scales, piano keys, note reading, rhythm, and so forth. To learn about some of the boom cards sets we offer and how you can use them, check out this blog post we did a few months back!
I have been getting looots of questions from teachers when it comes to boom cards so I wanted to create a resource with some of my most frequently asked questions for you to refer back to whenever you may need. Let’s get started!

How Do I Create a Free Account?
First things first, I want you to head on over to Boom Learning!
You should see a screen like this:

If you don’t already have an account, you’ll click “Sign In” located on the blue navigation bar at the top of the page.

It’s going to ask you if you are a student, teacher, or school. You’ll click: “I’m a teacher.”

From here you will click “Join for Free” and then proceed to sign up with either your email, Google, Microsoft, or Clever account.
Finally, it is important that you make sure to verify your account before continuing!
Yay, you’ve created your free account!
How Do I Create a Classroom?
Your classroom is where you are going to organize your students! Once you are in your account, you’ll click on “Classes” located on the blue navigation bar.

You will first want to change your name and upload a photo to make your classroom recognizable for your students!

You will start a “New Classroom” and from here you can begin adding in your students.
*I do think it is important to note that with the free account, you will only be able to have one classroom with 5 students. However, the next payment plan is only $25 for the entire year and gives you access to 17 classrooms and 150 students!
I did want to also mention that there’s an exclusive offer going on RIGHT NOW due to recent school closures!!! Here’s what it says:
“In response to recent school closures, we’re offering all new customers a 60-day free trial of our essentials membership for a limited time.”
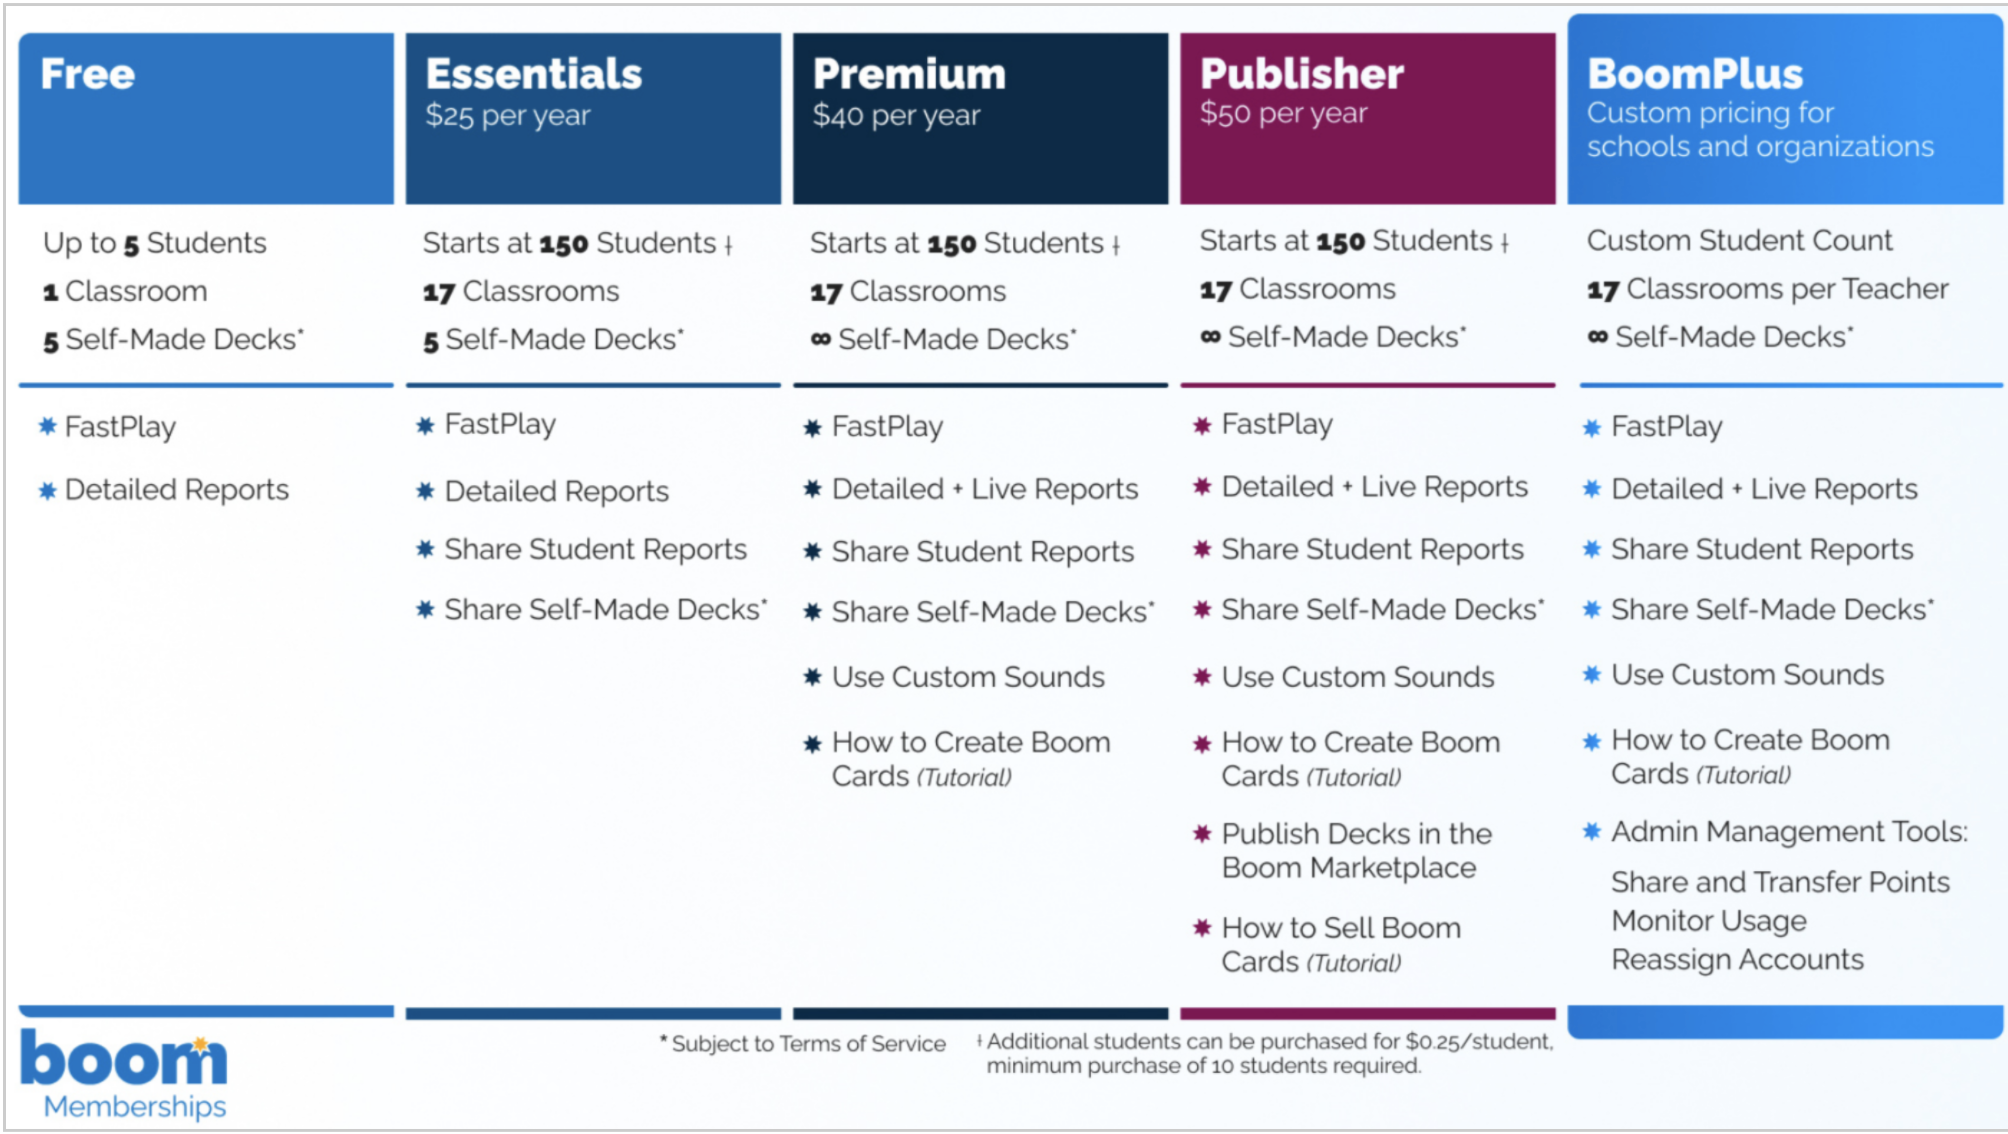
This is the membership that allows you to track up to 150 students and gives you the ability to create boom cards to share with the teachers at your school! As you can see it’s only for a LIMITED TIME so grab this deal while you can!!!!

Before adding in your students I would recommend changing the classroom code and password for your students to use when logging in. Choose something that is simple and easy for them to remember. (The code and password are BOTH case sensitive!)

From here you can now add your students manually one by one, or add many students at once.
It WILL automatically give each student a generated username. These are often hard to remember and contain odd characters. But NO worries, you can change each of these by just clicking on their username and changing it. My suggestion would be to use their first name and a number. So if Charlie4-26-0 was the generated username, I can simply change it to Charlie3. Much easier for Charlie to now remember his username. ??
During your lessons with your students, you can show them how to log on and use their username and password!
How do I assign decks to my students?
Let’s assign some boom card decks to your students! When looking at your classroom, you will see a tab that says “assignments.” Let’s head there!

Here you will be able to see all of the decks you have purchased and also any you have self made. I personally like to assign my kiddos all of my decks, but you can choose to do it however you would like! If you are working with a beginner or a student who gets overwhelmed easily, it might be nice to give them fewer options. 🙂
I let my students know I would like them to work on one deck a week! During their lesson, I may show them how to use the boom card deck and then I ask that they do it at home on their own time after that.
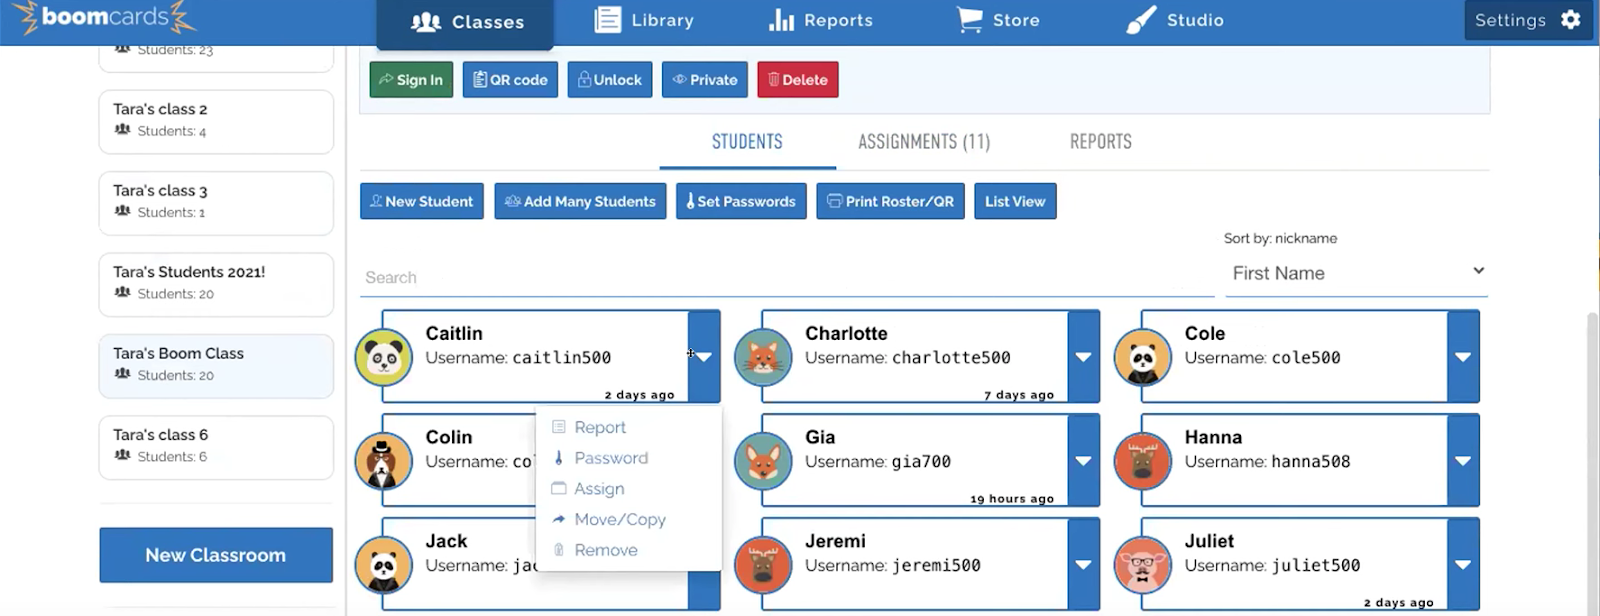
Now, let’s head back to our classroom and look at our students! Beside each name, there will be a down arrow. Once you click that down arrow you can check their reports, change their password, and look at their assignments. When you click “assign” you can see what deck each student has been assigned. You can also check or uncheck the ones you do or do not want them to do!
After all, you know your students and what is best for them! ?
How do I add boom cards to my account?
If you look at that top blue navigation bar, you will see LIBRARY and STORE. Your library is where all of your decks (bought or self-published) are stored!

I LOVEEEE the store! This is where you can purchase your decks or find decks for free! You can search through the featured categories, authors, decks, and even type in specifically what you are looking for in the search bar.
So, if I am looking for boom cards that are also cute for winter, I can type in “piano music winter” and browse through what comes up!
One of my favorite things about the store is that you can preview each deck before you purchase it to see whether or not it will be helpful for your students and what you are teaching at the time.
The last important note I want to touch on is the points that each deck costs. In this case, points = pennies. So if a deck is 350 points, it is $3.50!
Did you know that the Cascade Method Course includes FREE access to all of our boom card decks?!
This course is designed for piano teachers who want to use fun and modern methods in their studio! Become the best teacher you can be and inspire your students to develop a lifelong passion for creating music through fun teaching techniques all while growing your piano business to have a waitlist!
Learn more about the Cascade Method Course and start your certification today. You’ll get access to ALL our resources, including every single one of our boom card decks.
Don’t miss out on this resource! Not only are these cards great for learning and reviewing, but they also add FUN! Boom cards have made a huge difference in my student’s learning, and I know they will for yours, too. ? If you have ANY other questions regarding boom cards, drop a comment below and I promise to answer! I can’t wait for you guys to try these out with your students. If you’d like to see all the boom card decks we offer, check them out here!
